An outdoor kitchen goes in the same order every time: design and layout, permits, footings and base, framing or masonry, utility rough-in for gas, electrical, water and drain, then counters, appliances and finish work. The build itself takes 4 to 6 weeks on a typical project, with a 2 to 3 week minimum on the simplest builds and several months at the high end, per Fixr and HomeAdvisor — and design, permits and inspections sit outside that window. In a Chicago backyard, two of those steps decide whether the kitchen is still level and leak-free in five years: footings set below frost depth, and water lines that can be shut off and drained before winter.
This is that sequence in practical terms: what happens at each stage, which trades the work calls for, what gets inspected, and where a Chicago winter changes the detail. It is what outdoor kitchen builders quote from — a design-build project where masonry, utilities and finish work are sequenced around each other and around a village inspection schedule.
Outdoor Kitchen Installation Step by Step

1. Design and layout
The layout decides everything downstream: where gas and water have to run, how much counter you end up with, and whether the grill sits upwind of the seating. Fixr puts the average outdoor kitchen at about 200 square feet with roughly 20 linear feet of counter, and puts counter depth at the standard 25.5 inches for cooking, or 36 to 48 inches where people also eat at it. Distance from the house is the other design decision with a price tag: every utility is billed by the linear foot, so a kitchen far down the yard pays for four long runs instead of four short ones.
2. Permits: check with your village
Most outdoor kitchens need a permit, and usually more than one. Fixr's guidance is direct: in most areas you need a permit, especially where concrete is poured, because that is a permanent land improvement — and the permit generally covers plumbing and electrical changes too. Published fees run $150 to $500 in most municipalities (Fixr), $200 to $600 (HomeGuide), $50 to $500 per permit with $250 to $2,000 all in (HomeAdvisor). What no national number tells you is what your own village requires. Rules, fees and setbacks are set locally across Skokie, Evanston, Northbrook and the rest of Cook County, so check with your village before the design is final — the permit desk often decides how close to the house or the property line the structure can sit, and which inspections must pass before the next trade starts.
3. Footings and base
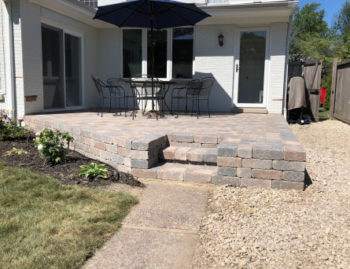
A masonry kitchen is a permanent structure, and permanent structures here are built below the frost line. The Chicago Building Code's frost protection section requires foundations and other permanent supports to be protected from frost, including by extending at least 42 inches below final grade. Suburban villages set their own depth, so confirm the number for your lot with your village. On an existing patio, HomeGuide's rule is that you can build on pavers set in mortar over a compacted, level base — but on loose pavers over uneven ground, the weight of the appliances will make them sink.
4. Framing or masonry
Two approaches, different budgets. A framed kitchen uses weather-resistant framing — HomeGuide puts the framework alone at $200 to $700 per linear foot — faced with stone veneer at $10 to $45 per square foot, brick siding at $8 to $18, or stucco at $3 to $9. A solid masonry build, brick or real stone laid over a footing, costs more and reads as part of the house rather than a unit set on the patio. Openings for the grill, doors, drawers and under-counter appliances are framed now, which is why the appliance list must be final before the mason starts: a cutout is not easily moved once it is set in block and stone.
5. Utility rough-in
Gas, electrical, water and drain lines are trenched and stubbed up inside the structure before the counters cap it. Published rates for the trades this stage calls for: a plumber at $45 to $150 per hour (HomeGuide) or $45 to $200 (HomeAdvisor), a gas fitter at $45 to $200 (HomeAdvisor), an electrician at $50 to $130 (HomeGuide) or $50 to $150 (HomeAdvisor), and a general contractor at $50 to $150 (HomeGuide, Angi). Modernize's advice here is plain: if you are running electric, gas or plumbing outside, plan on a qualified contractor for that part of the job. Which trades your village requires, and which stages need an inspection before cover-up, is a question for the permit desk — answered before the trench is dug, not after it is backfilled.
6. Counters, appliances and finish
Counters are templated to the finished structure and set: $40 to $200 per square foot installed (HomeGuide). Appliances follow — a whole new set runs $2,500 to $6,800 installed (HomeGuide) — then finish work: pointing, sealing, the patio around the base, lighting and any cover. Grade and drainage get their final pass here, because a kitchen that sheds water toward its own footing has undone the footing work.
Gas or Propane: Picking the Fuel Before the Trench
This is the decision that most changes the scope of the utility stage, and it is easiest to make at design.
Propane needs no trench. A 20 to 100 lb tank runs $35 to $150 (HomeGuide), lives in a vented cabinet under the grill and can be swapped by the homeowner. It keeps the build simpler and the permit narrower, at the cost of running out mid-cook and giving up a cabinet to tank storage.
Natural gas means a line from the house meter, priced at $12 to $25 per linear foot installed, or $15 to $50 and up for a natural gas grill connection (HomeGuide). Modernize puts the swap from propane tanks to natural gas at $500 to $600 added to a project. It never runs out, it adds a permit and an inspection, and it is a decision to make before the patio goes back down — retro-trenching a finished patio costs far more than running the line while the ground is open.
Whichever fuel you choose, size the run for everything the kitchen will ever hold. A side burner or second appliance added later is cheap if the line and stub are already there.
Electrical: GFCI Protection, Outlets and Lighting
Outdoor receptacles at a home need ground-fault circuit-interrupter protection. In the National Electrical Code's Section 210.8, outdoor receptacles at dwelling units fall under 210.8(A)(3), and the 2020 edition added 210.8(F) for outdoor outlets generally, per the International Association of Electrical Inspectors. Which edition applies is set by the code your village enforces, so confirm it locally. Modernize's practical note is that outdoor electrical for a kitchen typically means a separate ground-fault-protected circuit outside rather than an extension of an indoor one.
Plan the outlet count at design, not at finish. HomeGuide puts an outdoor outlet at $180 to $350 each and wiring at $4 to $9 per square foot; Fixr prices about $500 to run the electric, then $50 to $100 per fixture, appliance or outlet, and notes a larger kitchen can run $1,500 or more and may need its own permit. Lighting runs $80 to $300 per fixture (HomeGuide), or $500 to $3,000 for the line, averaging $260 per fixture (HomeAdvisor). Three kinds earn their place: task light at the grill and prep counter, low light on steps, and something soft over the seating.
Drainage, Grade and Winterizing

Much of the area sits on what the Illinois Department of Natural Resources calls the Chicago Lake Plain, a flat, poorly drained area composed of the lake bed sediments of glacial Lake Chicago. On slow-draining ground, water management is part of the build, not an upgrade to it: the pad is pitched away from the structure and the house, and a sink adds a drain run at $10 to $25 per linear foot (HomeGuide) that has to go somewhere legitimate rather than toward a neighbor's lot line.
Winterizing is designed in, not bolted on. The City of West Chicago's cold-weather guidance for outdoor plumbing is to disconnect garden hoses, turn off the basement valves and drain outdoor faucets — a kitchen sink needs the same: an accessible interior shut-off and a line pitched so it actually drains. Fixr notes outdoor-rated materials do not have to be covered, but appliance covers at $100 to $200 each extend their life, and only materials rated for outdoor use belong in the build.
Ventilation for a Covered Kitchen
A roof over the cooking area changes the requirements. HomeGuide states it plainly: any solid roof over a grill or stove requires a vent built through the roofing to prevent fire hazards. In practice that means a hood — $650 to $2,100 installed (HomeGuide) — ducted through the roof, plus the clearances the grill maker specifies to anything combustible above or beside it.
An open pergola solves shade without trapping heat or smoke over the grill. HomeGuide prices a pergola at $1,450 to $5,750, a gazebo at $4,300 to $10,000, a covered patio at $10,000 to $22,500, and a gable patio roof attached to the house at $14,000 to $31,000. If a solid cover is the plan, raise it with the permit desk early — a roofed structure is often reviewed differently from an open one.
How Long Each Stage Takes
| Stage | What decides the duration | Published timing |
|---|---|---|
| Design and permits | Village review queue, drawing revisions | Before the build clock starts (HomeAdvisor) |
| Simplest build | Prefab or modular on an existing patio with utilities in place | 2 to 3 weeks minimum (Fixr) |
| Typical build | Framing, flooring, utilities, appliance installation | 4 to 6 weeks (Fixr, HomeAdvisor) |
| High-end custom | Custom masonry, full enclosure, special-order appliances | Several months (Fixr) |
Two things stretch a local schedule. Weather: concrete, mortar and paver work all want above-freezing ground, and Fixr notes that while a kitchen can be built any time of year in favorable weather, winter conditions slow it. And inspection sequencing — a trench looked at before backfill, or a gas line signed off before the counter caps it — sets the pace no matter how fast the crew works. Stage costs are broken down in our guide to outdoor kitchen cost.
What to Prepare Before the Crew Arrives
- A final appliance list, with model numbers. Cutout dimensions drive the masonry. Changing a grill after the block is laid means rebuilding an opening.
- Utility decisions locked. Gas or propane, sink or no sink, outlet count, whether a cover is coming later. Each is a trench or stub that is cheap now and expensive later.
- Access for equipment. Gate width, overhead wires and how a machine or wheelbarrow route reaches the back yard. Tight access adds labor to every delivery.
- Locates and a marked plan. Existing irrigation, low-voltage lighting, drain lines and anything buried that predates you.
- Your village's requirements in writing. Which permits, which inspections, which setbacks, and whether a roofed structure changes the review.
- A layout you have stood inside. Chalk the footprint on the patio and walk it before it is built. Layout, material and feature options are covered in our outdoor kitchen ideas guide.
Installation Questions Chicago Homeowners Ask
How long does an outdoor kitchen installation take?
Fixr puts the build at a minimum of 2 to 3 weeks, with many taking 4 to 6 weeks and high-end projects running several months. HomeAdvisor gives the same four-to-six-week window for framing, flooring, utilities and appliance installation, and notes that planning, permits and design meetings happen before that clock starts.
Do I need a permit to install an outdoor kitchen in the Chicago area?
Usually yes. Fixr's guidance is that most areas require a permit, especially where concrete is poured, because that counts as a permanent land improvement, and the permit generally covers plumbing and electrical changes too. Published fees range from $150 to $600 (Fixr, HomeGuide) up to $250 to $2,000 in total (HomeAdvisor). Requirements differ village by village across Cook County, so check with your village first.
How deep do outdoor kitchen footings need to be in Chicago?
The Chicago Building Code's frost protection section requires foundations and other permanent supports to be protected from frost, including by extending at least 42 inches below final grade. Suburban villages set their own requirement, so confirm the depth for your address locally. The reason is the same across the region: a heavy masonry structure on a shallow pad can lift and crack through a freeze-and-thaw winter.
Can an outdoor kitchen be installed on an existing paver patio?
Yes, with a condition. HomeGuide's answer is that you can build on pavers set in mortar over a compacted, level base — but if the pavers are loose and the ground is not level, the weight of the appliances will make them sink. Check an existing patio for base condition and pitch before anything heavy is set on it.
Is natural gas or propane better for an outdoor kitchen?
Propane needs no trench and no gas permit: a 20 to 100 lb tank costs $35 to $150 (HomeGuide) and lives in a cabinet under the grill. Natural gas never runs out but needs a line from the meter at $12 to $25 per linear foot installed, or $15 to $50 and up for a grill connection (HomeGuide), and Modernize puts the swap at $500 to $600 added to a project. The decision belongs at design, before the patio is closed up.
Do outdoor kitchen outlets need GFCI protection?
Yes. In the National Electrical Code's Section 210.8, outdoor receptacles at dwelling units fall under 210.8(A)(3), and the 2020 edition added 210.8(F) for outdoor outlets generally, per the International Association of Electrical Inspectors. The edition in force is set by the code your village enforces, so confirm the current requirement with your village or the electrician doing the work.
How do you winterize an outdoor kitchen in Chicago?
Shut the water off at the interior valve, drain the outdoor line and disconnect any hose — the routine the City of West Chicago publishes for outdoor plumbing before a freeze. Fixr notes outdoor-rated materials do not have to be covered, but appliance covers at $100 to $200 each reduce weather damage. Designing in the shut-off and a drainable line is what makes it a five-minute job.
Plan Your Build With a Local Crew
The sequence above is the same everywhere; what changes is the ground under your patio, the distance to your gas meter and what your village asks for. R & G Almanza Landscape Inc is a family-owned, insured landscape and masonry crew working across Skokie, Evanston, the North Shore and the greater Chicago area since 1999. Contact us to walk the site and talk through layout, utilities and sequencing.
Call R & G Almanza Landscape at (847) 869-8584 to plan your outdoor cooking space.