A paver patio is built in nine stages, and every number that decides whether it survives a Chicago winter sits below the pavers. ICPI/CMHA Tech Spec 2 sets a minimum compacted aggregate base of 4 inches for patios over well-drained soils and says colder climates and continually wet or weak soils need thicker bases; Unilock's installation chart calls for 10 inches of gravel under a patio on clay subsoil, against 6 inches on sand. Bedding sand is screeded to an uncompacted nominal 1 inch and is never used to fill dips in the base, and the finished surface has to fall at least 1.5 percent so water leaves instead of standing.
Those four numbers separate a patio that is still flat in ten years from one lifting by its third spring. Below is what a correct paver patio installation looks like stage by stage, what each stage is for, and where Chicago's clay and freeze-thaw cycles change the method. If you are still comparing bids, the questions to ask before you sign turn these stages into things you can verify on paper.
What Goes Under a Paver Patio, and How Deep

An interlocking concrete pavement is four layers: compacted soil subgrade, compacted aggregate base, a thin bedding course, and the pavers, locked together by joint sand and held at the perimeter by edge restraint. Depth is decided in the base, and it depends on the soil.
| Subsoil under the patio | Gravel base | Bedding | Paver | Total excavation |
|---|---|---|---|---|
| Sandy | 6 in. | 1 in. | 3 in. | 10 in. |
| Silty | 8 in. | 1 in. | 3 in. | 12 in. |
| Clay | 10 in. | 1 in. | 3 in. | 14 in. |
Those rows are Unilock's published chart for patios and walkways, plus any loose subsoil. The industry floor is lower and more conditional: Tech Spec 2 puts the minimum compacted base for patios at 4 inches over well-drained soils, then states that in colder climates, continually wet or weak soils will require thicker bases, and that greater thicknesses are often used in regions with numerous freeze-thaw cycles or expansive soils. Skokie, Evanston and most of the North Shore tick all three boxes, which makes the Unilock clay row the realistic planning number here.
The Build, Stage by Stage
1. Layout, utility locates and excavation
The area is staked out and string lines pulled to establish finished grades before anything is dug. Tech Spec 2's first instruction is to call for utility locates at least two days before excavating and to check overhead clearances. Excavation then goes to the total depth in the table above, not the depth of the pavers. Cutting 6 inches on a clay lot and calling it done is the most common reason a build fails early.
2. Compacting the subgrade
The exposed soil is inspected and any organic material, roots, debris or large rock removed and replaced with clean compacted aggregate backfill, per Tech Spec 2, and standing water is pumped off. The soil is then compacted before any gravel goes on it, to at least 98 percent of standard Proctor density (ASTM D698) under pedestrian areas and residential driveways. A base built on soft soil settles no matter how good the gravel above it is.
3. Geotextile, where the soil calls for it
Geotextile fabric is laid between the subgrade and the base to keep the two from mixing. Tech Spec 2 notes it should be turned up the sides of the excavation, laid without wrinkles, and kept clear of truck tires when aggregate is dumped. CMHA's application guide also recommends it next to curbs, drains and utility structures, where bedding sand would otherwise migrate. On slow-draining clay it is cheap insurance.
4. The aggregate base, placed in lifts
Two base materials are common. Unilock describes a clear stone gravel of 3/4-inch pieces with no sand or fines, often called an open-graded or permeable base, and a 3/4-inch stone and sand mix known as three-quarter minus or road build gravel, which it notes requires additional compaction because it is less free-draining. Either is placed in layers, not all at once. Tech Spec 2 calls for spreading and compacting the base in 4- to 6-inch lifts with 7,000 lbf reversible plate compactors, and thinner lifts for machines in the 5,000 lbf range; Unilock's homeowner guide puts the layer at 3 inches, compacted each time. Base compaction targets the same 98 percent standard Proctor density, and the finished base must not vary by more than plus or minus 3/8 inch under a 10-foot straightedge.
5. Slope: where the water is being sent
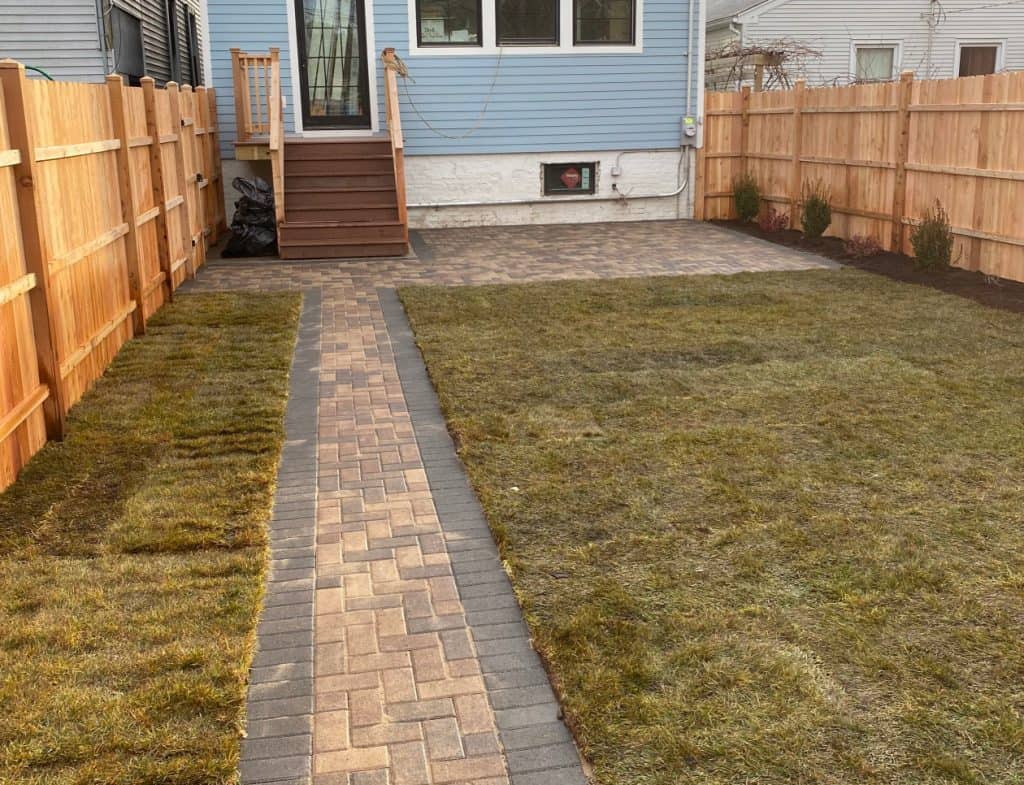
The base is graded to its finished pitch, not levelled flat. Tech Spec 2 states that slopes should be a minimum of 1.5 percent, roughly 3/16 inch of fall per foot of run. On a 16-foot patio that is about 3 inches of drop across the surface: more than most homeowners expect, and almost invisible underfoot. Direction matters as much as amount. Water goes away from the house and away from any low point that already collects, and downspout discharge is handled at the same time rather than left to run across the new surface.
6. Edge restraints
Edge restraint is the perimeter that keeps the field from spreading. CMHA's application guide calls edge restraints essential to performance, because they provide the lateral resistance that keeps the units interlocked, and lists aluminum, steel, plastic and concrete as the usual choices for patios. Tech Spec 2 asks for at least 1 inch of vertical restraining surface against the side of the paver, and CMHA's guide specification is explicit that restraints mount directly to the finished base, not to bedding sand.
7. Bedding sand
Screed rails are set on the compacted base and a thin, even sand layer is drawn flat across them. Tech Spec 2 calls for an uncompacted nominal 1 inch; CMHA's application guide gives 1 to 1 1/2 inches uncompacted. The material is concrete sand meeting ASTM C33. Tech Spec 2 is blunt about the alternatives: masonry sand for mortar should never be used for bedding, nor should limestone screenings or stone dust. It is equally blunt about a fast-job shortcut, stating that if the base is uneven, the bedding sand should not be used to compensate, because the unevenness reflects through to the surface later. Uneven base gets fixed with base material.
8. Laying and cutting the pavers
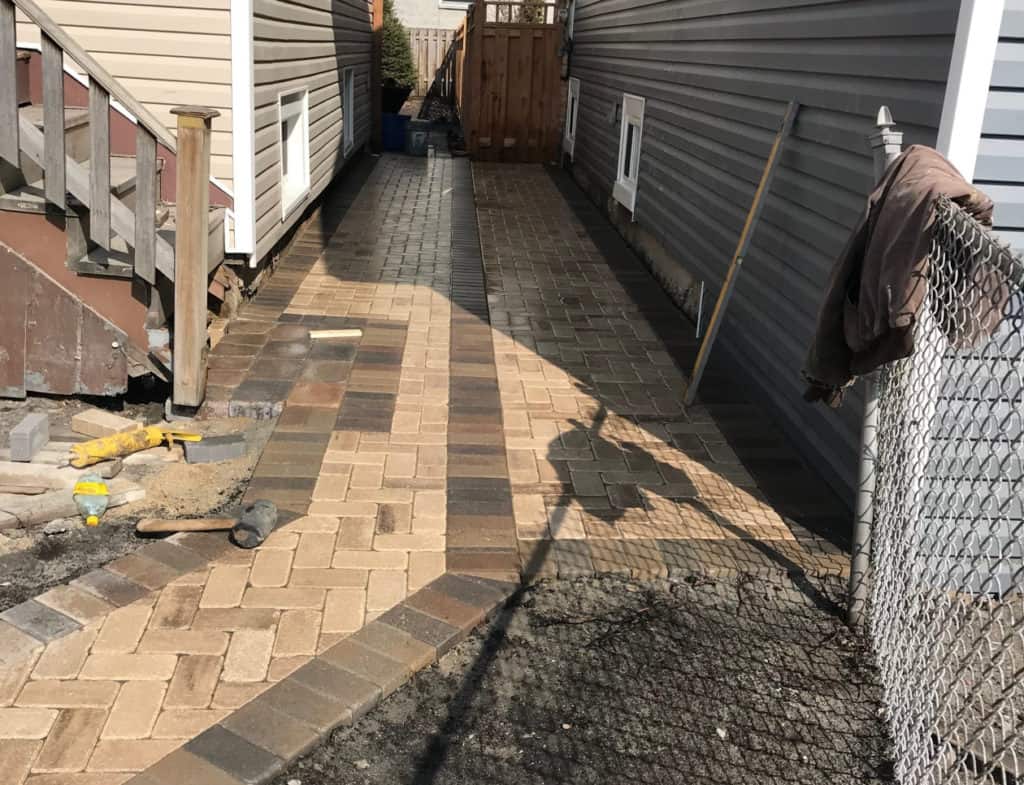
Pavers are set on the screeded sand without disturbing it, guided by string lines rather than the house wall, which is rarely straight. CMHA's application guide notes joints between pavers are typically 1/16 to 3/16 inch wide, and that pedestrian applications and residential driveways use 2 3/8-inch units while vehicular work typically needs 3 1/8-inch units. Cutting is done with a masonry saw for a clean edge, and Tech Spec 2 says gaps greater than 3/8 inch should be filled with cut pavers. Herringbone patterns, at 45 or 90 degrees, are what Tech Spec 2 recommends where load-bearing performance matters most.
9. Joint sand and final compaction
The field gets its first compaction before any joint sand goes down. Tech Spec 2 calls for a plate compactor capable of at least 5,000 lbf of centrifugal force at 75 to 90 hertz, and at least two passes to seat the pavers into the bedding sand. Joint sand is then swept in and the surface compacted again until the joints are full, typically another two or three passes, staying more than 6 feet back from any unrestrained edge. Most patios here are finished with polymeric sand: Techniseal's data sheet for EZSAND requires a minimum joint depth of 1.5 inches, joint widths between 1/16 and 1/2 inch, mandatory mechanical compaction, and temperatures above 32 degrees Fahrenheit for 48 hours afterward. Finished paver elevations sit 1/8 to 1/4 inch high against edges and drains to allow for minor settling, with lippage held to 1/8 inch or less.
Sealing: Optional, and Not Right Away
Sealing is a finish decision, not a structural one, and it has a waiting period. Techniseal's data sheet calls for 30 days after polymeric sand installation before cleaning and sealing, and restricts pressure washing during that time. The ICPI consumer guide on efflorescence adds a condition: pavers should be completely dry and free from efflorescence before any sealer goes on, because sealing over a white haze locks it in. HomeGuide prices sealing at $1.50 to $3.25 per square foot including the pressure wash, and Angi puts a sealer job at around $200 for up to 1,000 square feet. Sealed or not, joint sand is the part that needs attention over time, and topping it up is the first move in most paver patio repair work.
What Changes in Chicago Clay and Chicago Winter
Clay changes the base depth. Dense clay drains slowly and holds water, and water held in soil expands when it freezes, lifting whatever sits on it. Unilock answers that by moving a patio base from 6 inches on sand to 10 inches on clay, and Tech Spec 2 by calling for thicker bases in cold climates, on continually wet or weak soils, and in regions with numerous freeze-thaw cycles or expansive soils.
Clay changes the drainage plan. On free-draining soil a patio can shed water to the surrounding grade and be done. On clay, water that reaches the base has nowhere to go, so slope, downspout routing and any drain line are designed together rather than bolted on afterward. It is why so many Skokie and Evanston patio projects are really patio-and-drainage projects.
Winter closes the window. Tech Spec 2 states that frozen base material should not be installed and that material should not be placed over a frozen soil subgrade, and that frozen or saturated bedding sand should not be installed either. Techniseal's polymeric sand needs 48 hours above freezing after the joints are filled and ideally 24 hours without rain. Together those rules make late spring through fall the reliable installation window in the Chicago area, with shoulder-season work depending entirely on the forecast.
How Long a Paver Patio Takes
Two published anchors bracket most residential jobs:
| Scope | Published figure | Source |
|---|---|---|
| Laying rate, two-person crew | About 100 square feet of pavers per day | HomeGuide |
| 300-square-foot patio, professional completion | 35 to 40 hours | Angi |
| Polymeric sand, foot traffic | No downtime | Techniseal |
| Polymeric sand, vehicle traffic | 24 to 48 hours | Techniseal |
| Before cleaning or sealing | 30 days after the joints are filled | Techniseal |
Those figures describe laying time, not the whole project. Excavation, hauling spoil off site and compacting the base in lifts stretch a schedule, and all three get longer when the subsoil is clay and the excavation is 14 inches rather than 10. Access matters too: a backyard a machine can reach is excavated in a fraction of the time it takes to move the same material through a gate by wheelbarrow.
What It Costs Per Square Foot
HomeGuide puts installed paver patio work at $10 to $17 per square foot, split into $4 to $6 of materials and $6 to $11 of labor, and gives $1,400 to $2,500 for a 12-by-12 patio and $3,800 to $6,800 for a 20-by-20. Base materials alone run $1.40 to $2.20 per square foot, covering geotextile, road base, bedding sand, edging and joint sand. Those are national planning ranges; a Chicago-area quote reflects the deeper base this climate needs, which is where a build like the one above spends its money.
Paver Patio Installation FAQ
How deep should a paver patio base be in Chicago?
Tech Spec 2 sets a minimum compacted base of 4 inches for patios over well-drained soil and calls for thicker bases in colder climates and on wet or weak soils. Unilock's chart is the practical local answer: 6 inches of gravel over sandy subsoil, 8 over silty and 10 over clay, which is what most North Shore backyards sit on, for about 14 inches of total excavation.
What kind of gravel goes under a paver patio?
Unilock describes two options: a 3/4-inch clear stone with no sand or fines, often called open-graded or permeable base, and a 3/4-inch stone and sand mix known as three-quarter minus or road build gravel, which needs more compaction because it drains less freely. Either is spread and compacted in layers rather than dumped to full depth.
What sand goes under pavers?
Concrete sand meeting ASTM C33, screeded to an uncompacted nominal 1 inch per Tech Spec 2, or 1 to 1 1/2 inches per CMHA's application guide. Tech Spec 2 rules out masonry sand, limestone screenings and stone dust for the bedding course. The sand is never used to level a bumpy base, because the bumps reflect through later.
How much slope does a paver patio need?
Tech Spec 2 states that slopes should be a minimum of 1.5 percent, roughly 3/16 inch of fall per foot of run. On a 16-foot-wide patio that works out to about 3 inches of drop across the surface. The pitch should carry water away from the house and away from any area that already collects water after rain.
Do paver patios need edge restraints?
Yes. CMHA's application guide calls edge restraints essential to the performance of interlocking concrete pavement, because they supply the lateral resistance that keeps the units interlocked. Tech Spec 2 asks for at least 1 inch of vertical restraining surface against the side of the paver, and CMHA's guide specification requires the restraint to mount to the finished base, not to the bedding sand.
How long does a paver patio take to install?
HomeGuide notes a two-person crew lays about 100 square feet of pavers per day, and Angi puts professional completion of a 300-square-foot patio at 35 to 40 hours. Those cover laying; excavation, spoil removal and compacting the base in lifts add time, and add more on clay, where the dig is deeper.
Can pavers be installed in winter in Chicago?
Not once the ground freezes. Tech Spec 2 states that frozen base material should not be installed and that material should not be placed over a frozen soil subgrade, and rules out frozen or saturated bedding sand. Techniseal's polymeric sand needs temperatures above 32 degrees Fahrenheit for 48 hours after the joints are filled. Late spring through fall is the reliable window here.
Build It Once, on a Base Made for This Climate
Nearly every paver patio that fails in the Chicago area fails for a reason on this list: too little base, too few compaction passes, no edge restraint, no slope, or joint sand installed outside its weather window. R & G Almanza Landscape Inc is a family-owned, insured crew based in Skokie, building patios, walkways and hardscape across Skokie, Evanston, the North Shore and the greater Chicago area since 1999. Contact us to request an estimate and we will measure the site, check the soil and drainage, and put the base depth in writing.
Call R & G Almanza Landscape at (847) 869-8584 to talk through your patio build.